When you create a default query component you might miss some of the features that ADF offers to you. One of these is the use of lists in the query component. In this post I'll explain to you how to do that.
First image here is the way a query component displays when you use all the defaults, and do no tweaking at all. Forget that I already changed some attributes so they are not displayed in the query component.
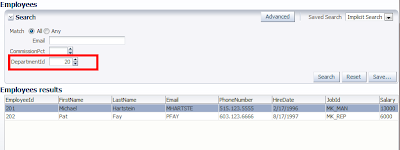
It looks ok, but the user of your application might not be so happy. They have to know the id of all departments. This is fine when you only have a few, but what if you have many ?
Let's try to add a list to the query component.
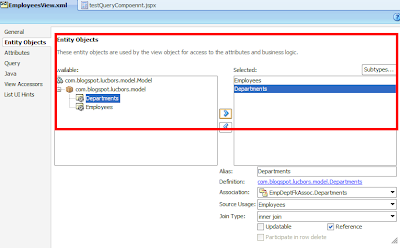
We have to start with the creation of the lookup item for department name. This can also be used in the actual table showing the results. First we add an entity usage for departments to the employees view object
After this we can add the lookup items.
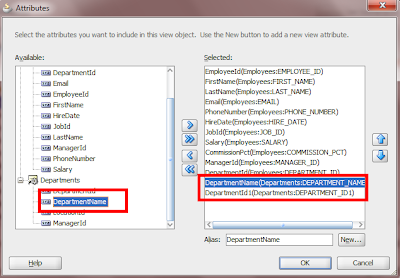
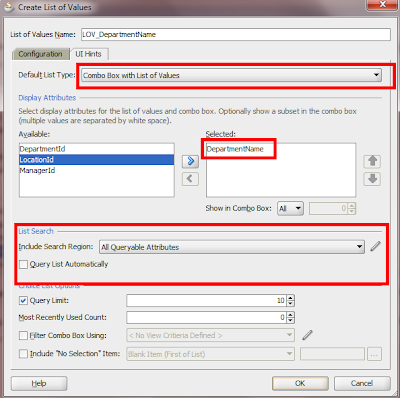
Now create the list of values. The list of values should be based on the departments name attribute.
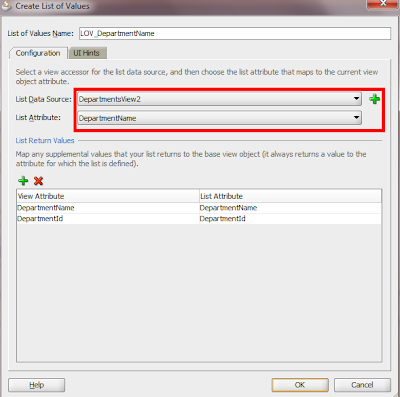
On the second tab set the UI hints for the list of values. Be aware of the fact that you can only use a couple of list types that can be used in the query component. For now we pick the combo box with list of values.
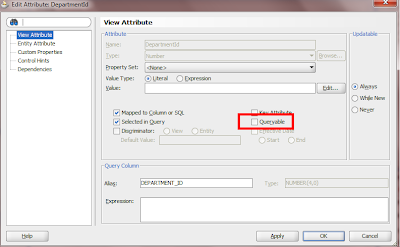
The last step in the process is to set the queriable property of the departmentId's (both base and lookup) to false.
When you run the page now, you will see that the
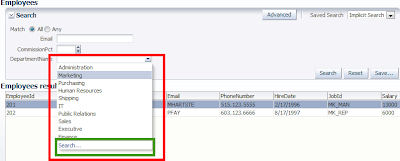
You can even invoke a complete List Of Values, when you select 'search...' in the combobox (green area in picture above).
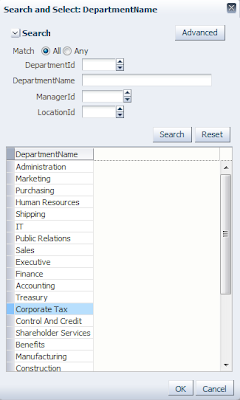
Much better than working with department id's (see the difference with the first picture in this post).
First image here is the way a query component displays when you use all the defaults, and do no tweaking at all. Forget that I already changed some attributes so they are not displayed in the query component.

It looks ok, but the user of your application might not be so happy. They have to know the id of all departments. This is fine when you only have a few, but what if you have many ?
Let's try to add a list to the query component.
We have to start with the creation of the lookup item for department name. This can also be used in the actual table showing the results. First we add an entity usage for departments to the employees view object

After this we can add the lookup items.

Now create the list of values. The list of values should be based on the departments name attribute.

On the second tab set the UI hints for the list of values. Be aware of the fact that you can only use a couple of list types that can be used in the query component. For now we pick the combo box with list of values.

The last step in the process is to set the queriable property of the departmentId's (both base and lookup) to false.

When you run the page now, you will see that the

You can even invoke a complete List Of Values, when you select 'search...' in the combobox (green area in picture above).

Much better than working with department id's (see the difference with the first picture in this post).
Comments
http://blogs.oracle.com/shay/2009/12/adf_query_with_parameters_and_1.html